Most of the United States can reach freezing temperatures, so we have to prepare and protect our boats correctly for winter storage. If you miss a critical step to keeping your boat safe during winter storage, the result can be very costly. This could ruin the beginning of the boating season for you and your family. This article will provide you with a detailed checklist to be certain you don’t forget any steps in protecting your boat.
A good winter storage checklist provides a way of never forgetting a vital step in preparing your boat for winter storage. My checklist includes these topics in full detail:
- Finding a suitable storage location
- Inspecting the boat for any damage or wear
- Doing any required repairs
- Grease, lubrication, and rust preventative locations
- Clean and protect your boat inside and out
- Winterizing pre-steps and required supplies
- Steps to properly winterizing your engine(s)
- Outdrive and outboard drive oil
- Removing water from every water system on board and treatment
- Seal out the harsh elements of weather
- Trailer prep and maintenance
Part of boat ownership is keeping up with maintenance and having a safe location to keep your boat. I’ll show you why the end of the boating season is the perfect time to prepare your boat. This way, when it comes out of storage in the spring, it’s completely ready for the new boating season. Use my free checklist and instructions to be sure you maintain a great boat that will be reliable for many years to come.
Finding A Suitable Boat Storage Location
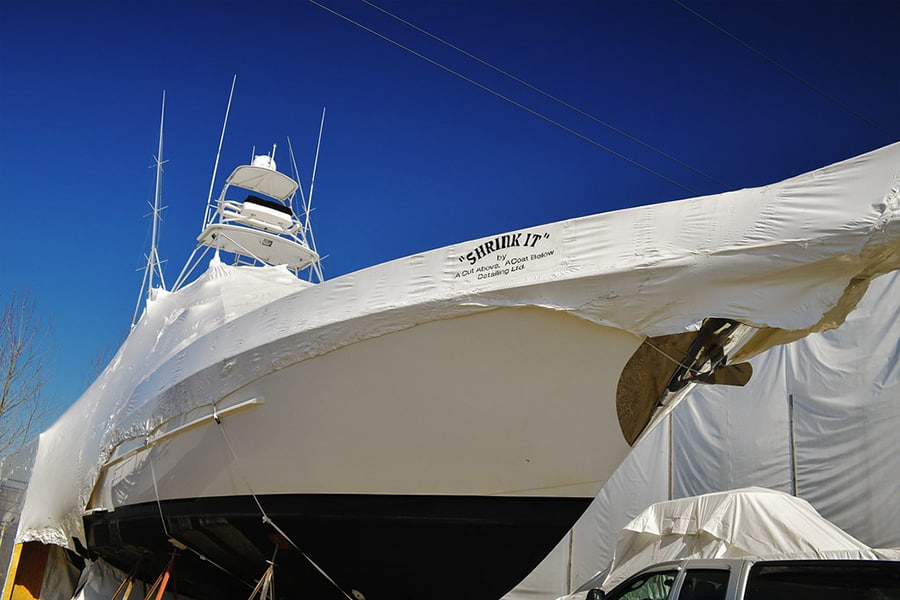
Don’t wait too long before you search for winter storage for your boat. In many cases, the good locations get filled up quick and rates can increase as they reach capacity. I worked on my most recent boat project too late into the season, and everything was full. So I ended up having it shrink wrapped and have an access door into the boat so I can still work on the interior on nicer days.
Here are the most common extended storage location options, listed from cheap to expensive:
- If you have the space to store the boat on your own property and keep it safe from the elements of weather, this would be the lowest cost scenario.
- Another option is storing your boat at family or a friends space. With enough asking around, someone will likely know someone who can accommodate your boat.
- A great place to check for very low cost winter storage space for your boat, is your local county fairgrounds. Don’t be afraid to check other nearby county fairgrounds either. There is some REALLY cheap winter storage available this way.
- You can check Craigslist and other classifieds for property owners offering winter storage. They’ll most likely cost more than the fairgrounds, and have less security.
- A self storage facility can usually accommodate a boat, but often times it will be outside storage. Anything under roof is going to be quite pricey at this type of facility and I would suggest finding another option. However, if you have your boat shrink wrapped, then outside storage is fine. Having your boat shrink wrapped will run you about $10 per foot or more in most places.
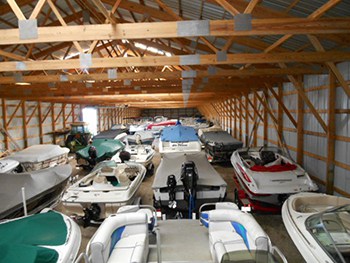
- Then your most expensive option for storing your boat for the winter is going to be Rack Storage at your local marina. They have giant shelving units in big buildings and they take your boat off the trailer and place it up into the rack with a large forklift. It’s very safe and very expensive. Pricing varies widely, but it’s always a pricey option.
Choose a winter storage location and book your spot early to avoid late season panic as spots fill up.
Inspecting Your Boat For Damage Or Wear
 Once you have your boat on it’s trailer and located back at your home, it’s time to give it a complete inspection for damage and wear. It’s really not that difficult, so lets make another checklist for your inspection.
Checking your boat’s moving parts for wear
We want to see if your cables and bushings are getting worn out. So you’ll do a couple simple tests without running the engine. Then we’ll check a couple other components for lash.
- Grab your stern drive and move it from left to right. Does the steering wheel move instantly when the stern drive is moved? Also, do you feel any play in the bushings when it is moved? There should be no lash or wiggle to the movement. Also have someone hold the stern drive in place while you try to move the steering wheel. You should not be able to move the steering at all without them feeling it at the stern drive. Outboards are similar in checking a boat’s steering cable lash.
- Check your boat’s throttle/shift cable for lash and ease of movement. Lash is not likely going to be your problem. It will be the cable getting stiff. If the cable is very old or overly stiff, it may be best to replace them. West Marine has an excellent PDF explaining how to choose a cable and what quality you should buy, so you can read it here if you need to replace.
However, it’s most likely that you can just push lubricant into the cable and be good for years to come. Just be sure that the cable housing isn’t cracked, broken, or kinked in any way, because then you would need to replace them (this goes for either cable).
Here’s a video on a very effective way to get lube into your boat cables. You can do this with the cables still in the boat, but wrap rags around cable ends to catch any escaping lube.
- Move the throttle forward until it just hits the indent for forward gear. Turn the prop by hand to be sure it has a solid engagement. Then do the same process for reverse gear. This will be an indicator that your shift cable adjustment is correct.
- Check for loose or wobbly pedestal seats. Most of the time you may just need to tighten the mounting screws, but there are plastic bushings in swivel seats that can wear out and need replacement or adjustment. This is easy to do and self explanatory.
- Clean and lubricate any door, engine cover, and storage seat hinges. If any hinges have loose screws, tighten them as well.
Clean the exterior of your boat’s hull
This means from the very top, to the very bottom and from front to back.
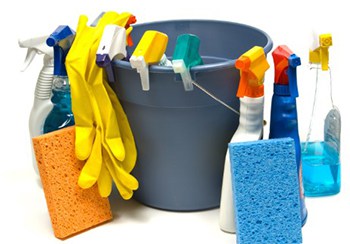
- If you have any hard deposits below the waterline, you can go to Amazon and purchase a spray bottle and some toilet bowl cleaner (do not use the GEL cleaners for this). Using goggles, face mask, and rubber gloves, pour the toilet cleaner into the spray bottle. Soak the affected area and let it set for 10 minutes, then repeat as needed. You’ll see the hard deposits disappear. Once it looks like the deposits are gone or softened, pressure wash it clean. You may find that stubborn deposits require a little scrubbing before washing but “be patient”. Some deposits can take a long time to get clean. This process should take place over gravel or non grassy area. There are other marine hull cleaners on the market also. Some of them work, but are more costly and I’m trying to save you money.
- For the rest of the hull, you can use hull cleaner or Miracle Mist available on Amazon which works great. For scuffs from docking, you’ll find that Mr. Clean Magic Eraser sponges work great. You can also get them on Amazon.
- Look for any chipping, gouges, or cracking. Cracking could be a sign of weakened internal structures. You may want to consult a specialist for this. Chips and gouges can be repaired by you fairly easy. There are hull repair kits available on Amazon, like the White Marine Coat One gelcote repair kit. This stuff is easy to work with and strong as nails, and I recommend it because it is what I use. It comes with 6 quality tinting pigments if your hull isn’t white. Just be sure to follow the instructions on the can exactly. There are also smaller kits such as the Evercoat Gelcoat Repair Kit that you can also tint to the color of your hull, if it’s not white.
- Once you have all hull repairs completed, now would be a good time to apply a good marine wax to protect your hull and help keep it looking clean. Having a quality marine wax applied to your boat also makes is much easier to keep clean as nothing is going to really be able to stick hard to it. I like Meguiar’s Premium Marine Wax, as it really leaves a deep gloss and is super easy to use.
BTW: I know that I am placing several Amazon links throughout this article, but I want to make it easier for you to find and research the exact products I use. Yes I make a small Amazon commission to help support this site (at no cost to you) and I am pointing directly to the best priced products. You will also be able to verify my opinions of these products via the reviews.
Clean the interior of your boat
 One of the best ways to inspect something, is to clean it. It needs to be cleaned anyway, but you’re looking with a very detail oriented eye to get it clean and you can then tell what is dirt and what is damage. You’ll see or feel every imperfection, and won’t miss anything. After everything is clean, it’s time to make the needed repairs.
- You may have some damage to your vinyl seats. If it’s a small cut or tear, you can use a very simple vinyl repair kit to fix the issue. The kit I recommend using, doesn’t require heat to be applied in order to cure the repair. I prefer NOT to use heat on vinyl, because it’s easy to make your problems worse, real quick. Using a heat gun or iron can quickly dry out or burn your vinyl. Get the Coconix vinyl repair kit on Amazon for a great price.
- Is your carpet coming loose anywhere? If so, check to see if the floor is soft. If the floor is solid, then pull the carpet back from the nearest edge. Scrape out any loose glue and dirt. Apply a thin layer of indoor/outdoor carpet glue (from your local hardware store or Amazon) to the exposed floor. Use the correct trowel for spreading glue, as per the product instructions.
If you find any spots in your boat’s floor that are soft, it is better to address the issue now versus later when the problem expands. To get a better understanding of this process, check out my article on rotted boat floors.
Winterizing Pre-steps And Required Supplies
Now it’s time to get ready to winterize your boat’s engine and outdrive. You also will prepare the freshwater system including supply lines and drains. We also have to winterize the sewage tank and toilet, as well as any floor and storm drains. Most smaller boats won’t have many of these systems, but I’ll cover them anyway.
Here’s a list of things you may need, to prepare your boat for extended storage:
- The proper oil and filter to do an oil change. (While you’re on Amazon, check for your specific engine parts)
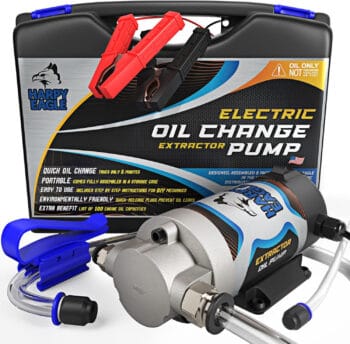
- Oil extractor pump. (sucks oil out of the dipstick tube)
- New fuel filter/water separator. (While you’re on Amazon, check for your specific application)
- A can of fogging oil.
- Fuel stabilizer additive.
- RV/Marine antifreeze (5 gallons for a V-8). It’s inexpensive so it won’t hurt if you have too much.
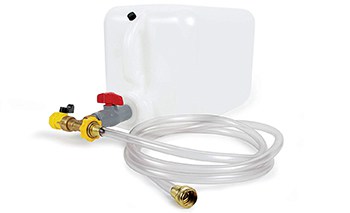
- Do it yourself boat engine winterizer.
- Dehumidifier or moisture absorbing boxes.
- Lower unit oil for your outdrive or outboard.
- Lower unit lube filler pump.
- Transmission oil for many inboards and V-drive boats.
 You’ll want to put your fuel stabilizer into the fuel tank and go top it off with premium fuel. You want the fuel tank completely full to help avoid any condensation building up. I recommend using STA-BIL 360 Marine fuel stabilizer from Amazon to maintain the integrity of the fuel during storage.
You can get your oil and filter on Amazon at the same time, along with your fuel filter. Just search for your boats fitment. However, you should buy the Non-toxic RV/Marine antifreeze locally because of shipping weight. I get mine at Menards for just a couple dollars per gallon.
If you have an inboard or V-drive boat, you need to use the correct transmission fluid for your exact transmission. Consult your manual for this and you can probably include it in your Amazon order.
All the other links in the above list lead to the products I personally use from Amazon. It’s usually the very best price and shipping for the exact products. It saves me from running all over to source exactly what I need. All I have to do is pick it up off my front porch.
Once you have the boat in position at home, inspect the bellows seals for any tearing or wear. Grease the zerk fittings for the gimbal and gimbal bearing. Raise the front of the boat as high as possible to try draining out any remaining water from the hull.
Reattach your trailer to your tow vehicle for stability. Lower the outdrive as low as possible leaving an inch or two clearance. Now open the engine cover and remove the air cleaner.
Steps To Properly Winterizing Your Boat Engine(s)

 Fill up your “Do it yourself boat engine winterizer” with 5 gallons of non-toxic RV/Marine antifreeze. Do not dilute the antifreeze. There is still water in your boat engine that it will mix with, and you don’t want to lose your freeze protection. Set it up on your swim platform or a table close enough to reach your outdrive.
- Hook up your “Do it yourself boat engine winterizer” to your outdrive using your Camco dual feed boat muffs and also to your house hose. Turn both valves off at the winterizer, and turn on the water supply from the house.
- Now turn on the valve that allows only your house water to flow to your sterndrive lower unit, and then start your boat engine. You want to let it get warm so the thermostat opens and also the stabilized fuel works it’s way to the engine.
- Once the engine is warm, turn off the valve for the house water supply and immediately turn on the valve to let the antifreeze flow. As the antifreeze is getting near empty, spray fogging oil into the carburetor. Continue spraying until the engine dies. If it won’t die before you’re out of antifreeze, shut the engine off with the key. Your goal is to flood it out with fogging oil.
- Shut off water at the house and disconnect your winterizer.
- While engine is cooling down a bit, top off your power steering fluid and hydraulic trim oil. Then check to be sure every hose clamp is tight. Also check the engine belts tension and adjust if necessary.
- Remove drain plug on the outdrive and drain gear oil into a drain pan. Also remove the upper fill level plug. Once drained, use your “Lower unit lube filler pump” installed into the lower hole on the outdrive, and the suction end of the pump into your “Lower unit oil for your outdrive or outboard” and pump the oil in until it comes out of the upper level plug hole. Then reinstall both plugs in the lower unit.
- Remove your propeller. Clean and inspect the shaft and seals. Grease the prop shaft with a quality marine grease, and reinstall the prop.
 Replace fuel filter/water separator/filter.
- Extract the engine oil using your “Oil extractor pump“.
- Remove old oil filter and replace with your new one. Then fill the engine with the proper oil up to the proper level. Note – that you will need to start the engine in the spring to warm it up and then top off your oil. Leave a quart of oil on the engine so you don’t forget to top off in the spring.
- Clean the engine and bilge area. Some people like to wipe the engine down with a little fogging oil to stop possible corrosion.
- If you have onboard fresh water and a head, you need to empty the sewage tank and then flush the toilet 7 times with fresh water. Then empty the waste tank again. Then with the toilet empty, add some marine antifreeze to be sure no residual water can freeze.
- Your fresh water tank needs to be emptied, and then put non-toxic marine antifreeze into your fresh water tank and run all faucets and showers until you see antifreeze coming out. Do these steps also with the hot water side if so equipped.
- Blow out all your drains including sinks, floor, and rain drains with compressed air. Use a rag wrapped around your air nozzle to help create a seal so all air is blasting out the remaining water.
- Now run the antifreeze through each faucet and shower long enough to fill all drains with antifreeze, including your shower sump pump (pull the fuse for the shower discharge pump so it can fill all the way up with marine antifreeze.
- Pour antifreeze down each rain drain.
- Disconnect your batteries and remove for storing indoors. Be sure to clean the battery terminals, as well as the battery connectors in the boat.
 Replace fuel filter/water separator/filter.
For inboard and V-drive boats, also change your transmission oil. You can use the same Oil extractor pump that you used for engine oil. Please remember to dispose of all old oils properly.
Outboard motors don’t require antifreeze, but I treat it anyway. It’s cheap and easy to be extra safe. Your outboard also has to be run without the fuel line hooked up until it dies, but only after it has been run with stabilizer in the fuel for a bit. Then you remove the spark plugs to spray fogging oil in them. Reinstall spark plugs.
Seal The Harsh Elements Of Weather Out Of Your Boat
 Here is where you need to know how you’ll be protecting your boat from the harsh elements of winter weather. Here are your options from totally safe, to probably safe:
- Store your boat indoors
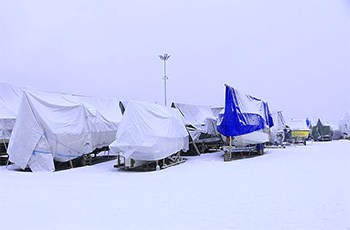
- Have your boat shrink wrapped
- Use your boat cover and then a tarp over that
- Only use your boat cover
The snow and ice, along with heavy winds and rain, can put a heavy load on your boat cover. If you have a really good cover with plenty of support under it, it just may keep the weather out. Adding a tarp on top helps the snow slide off, as long as there is a steep enough pitch.
When a boat is shrink wrapped, it’s done with tall enough support posts to create a steep pitch. There is no way snow is going to sit on it, plus it is a very slick surface. However nothing beats having indoor storage space, because the only weather element that it’s exposed to is the cold temperatures.
One thing is for sure though. Having followed all my long term, and winter storage steps, your boat is going to ready to go in the spring and will give you great service for many years to come. There are just a couple more steps before you seal up your boat for the winter.
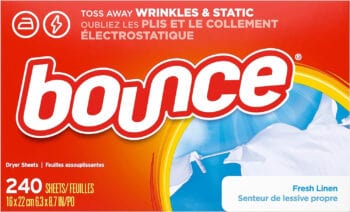
![]() Get a box of dryer sheets from Amazon. Place a dryer sheet:
Get a box of dryer sheets from Amazon. Place a dryer sheet:
- in each and every compartment
- on and around your engine
- the dash
- every few feet in open areas
- in the drain plug hole
- over any possible entry point for mice
Lastly, set a few moisture absorbing boxes (from the list above) in your boat. They act like a dehumidifier, but you don’t have to rely on having electrical power to them.
When you open up your boat in the spring, there will have been no rodents in your boat and it will smell like fresh laundry.
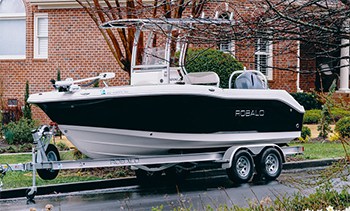
Trailer Prep And Maintenance
Now that you have prepared your boat for storage, it’s time to give your trailer a quick check-up. Just a side note, about where you park your trailer. You want to be sure you’re parking on a hard surface. When you park it in the grass or dirt, the moisture will rot out your steel trailers quicker. At least park on gravel, which still isn’t the best.
Start with cleaning your trailer’s electrical plug/pigtail. Use the Innovative Products Terminal Connector Cleaner tools (pricey but SO worth it) and some electrical cleaner spray (both available on Amazon. Once it’s clean an dry, use some electrical grease on the terminals. You should do the same to your tow vehicle.
Now clean and grease the trailer coupler and then hook it up to your tow vehicle. Check for extra play in the connection and adjust the coupler as necessary. Refer to this video for proper adjustment procedure.
Now plug in your trailer’s electrical plug into your tow vehicle and test your trailer lights. If all checks out, great. If not replace the faulty part and then lets move on to your tires and wheel bearings.
Jack up your trailer, one side at a time. Grab both sides of the tire and try to wiggle it by pulling on one side and pushing on the other. If you feel lash or play, then you will need to adjust the bearings. Also if you haven’t cleaned and repacked the bearings in a couple years, you should do this now.
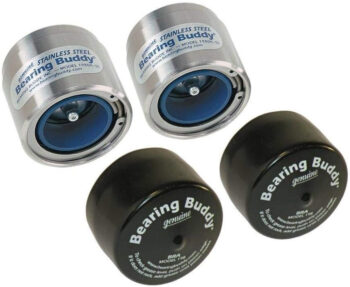
![]() If you have repacked your bearings in the last couple years and there is no extra play in them, then pump a little marine grease into your bearing buddies (most trailers have these). Now look for any cracking on the sidewall of your tires. If you see any, it’s time to replace them. Cracking usually takes place before the tire tread wears out on boat trailers, but if the tread is low, also replace them.
If you have repacked your bearings in the last couple years and there is no extra play in them, then pump a little marine grease into your bearing buddies (most trailers have these). Now look for any cracking on the sidewall of your tires. If you see any, it’s time to replace them. Cracking usually takes place before the tire tread wears out on boat trailers, but if the tread is low, also replace them.
Here is a video showing how to repack and adjust your trailer bearings.
Do the same process on the other side. Lastly, inspect the bunks or rollers supporting your boat. If there are any signs of weakness, rot, or wear, this will need to be repaired. If it can wait until spring when you can have the boat off the trailer, it would be a better time to do the repairs.
Wherever you store your boat trailer, it would be best to put jack stands under the axle to get the tires off the ground. It’s better for the tires and helps them last longer.
If you follow all the steps in this article, you’ll find that you’ll have very little maintenance required during the boating season.